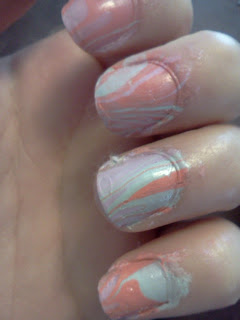
Water marbling! Okay...so I'm definitely not the best at this technique, but I figured I'd share with you guys how I do it, what I use, and some little tips.
I use: Any choice of two or three nail colors (*tip, Cremes work best. Sheerer polishes give WAY less coverage. Also I don't recommend trying to use glitters. You can always spice up your mani at the end.) Chapstick (no, not for your luscious lips), something to remove polish, something to drag the polish together in the water (I used an old nail file. you can use literally like...anything pointy.) Qtips(not shown. oops.) and a baby medicine cup. If you have super long nails you can use a cheap shot glass. Shown down below!
I don't recommend drinking while doing this. bahaha.
Step 1: Put chapstick around your nails (NOT ON THEM!) and on the backside of your finger. This way after you put your finger in the water marble it's WAY easier to get off.
Steps 2&3: Fill up your medicine cup (or shot glass) with lukewarm water. Cold water actually makes the polish dry faster! Then drop two drops of your first color into the water.
Step 4: Continue adding your colors. If you're just starting out I recommend trying two, but three never hurt anything right!
Step 5: From the outside edge in, use your item of choice (I used that old nail file of mine). So take the outside polish and pull it in towards the middle as many times as you want!
Step 6: Find the part of the design that you like, and place your finger in the polish. The polish in front of your nail will adhere to the nail as you put your finger in. Repeat this on all of your nails!
Step 7: BEFORE YOU TAKE THE NAIL OUT OF THE WATER, blow on the surface of the water. This will help the remaining polish on the surface to dry. Once the polish starts to look "plasticy" as you blow on it, use your dragging tool (I used my nail file) and pull away the polish from the front of your finger. This will give your nail just clear water to come up out of when you pull it out of the water.
*tip: Don't worry about any little water bubbles that might appear on your nail, just blow on your nail hard and the should roll away.
Pre - Cleanup
Step 7: Using a bunch of qtips, clean up around your nails, and behind your nails. All the places that polish is at except your nails!
So...you can either put a top coat on, or move on to the next step!
Step 8: Get a dotting tool and one (or two) of the polishes you used for the water marble, and place some dots in the direction of the curves in your watermarble.
Once you're done, put your topcoat on and seal everything in!
*Polishes used: All Julep: Teri, Simone, and Shenae.


.jpg)


